Shipping Container Conversions 2 x 18ft side joined
CS22897
Pricing
*Call For Delivery Costs
This conversion was requested by a garden centre in Hampshire, to display and demonstrate garden products. As shipping containers are mostly made to a standard width of 8ft, in order to create a larger width, we used two shipping containers, with the side walls removed, and welded the two seperate units together on site, upon delivery. Read on to find out more about this dual container conversion.
CD Code CS22897
Before the project can begin, we need to cut the shipping containers to size, to achieve the length of 18ft. On this occasion, we used the 'cut and shut' method, in order to retain all four corner posts on both containers. The corner posts give the container additional strength, especially during lifting. If our client requests these are left in tact, we use both ends of the same container during the cut up process, and then weld back together to the required length.
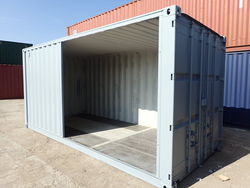
The two 18ft containers have their side walls cut, to create the opening which will join them. The two new apertures are then reinforced with a 100mm x 50mm steel box section frame. Read our news article LARGER CONVERSIONS - JOINING SHIPPING CONTAINERS TOGETHER for more on this process.
Container 1 has the original shipping doors left in place on the end. For container 2 we fabricated two half width (4ft), easy use flat panel doors, one for the end wall and in the side, to lead to the soon to be partitioned area of the container.
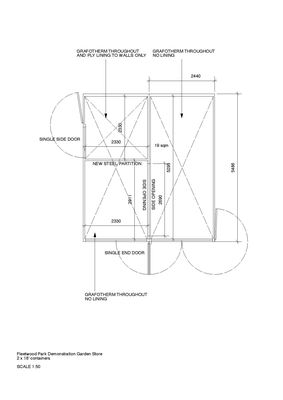
Our client had requested a seperate area of 8ft x 8ft. First we made a steel frame work to size, and welded this into the container. Next we cut steel sheets using our guillotine, which are used to fill the framework.
To insulate and prevent condensation, our client requested ply lining for the small partitioned area. The rest of the container, and all of Container 1, was treated with Grafotherm, sprayed onto the ceiling to inhibit condensation.
To complete the conversion, we inserted a 300mm steel plate into the floor, with a 50mm drainage hole, to allow excess water to run away, in the floor of the container. Both containers were then repainted grey, and are ready for delivery. The containers are transported to their required destination as two units, accompanied by our welder who bolts and welds them together at the garden centre.
Using computer aided design, we worked alongside our client's wishes to create an exact plan of their requirements.
 .
.
Features
Design
Container 1
- Original container doors
- Removed 8ft 10in section of side wall
- Grafotherm anti condensation treatment
- Repainted grey
Container 2
- 4ft flat panel door in end wall
- 4ft flat panel door in 18ft side wall
- Removed 8ft 10in section of side wall
- Grafotherm anti condensation treatment
- Steel partition to create 8ft x 8ft section
- Ply lining in 8ft x 8ft section
- 50mm drainage hole in floor
- Repainted grey
Starting with 2 x18ft containers
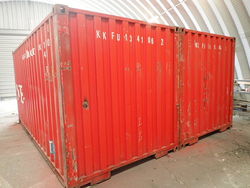
Before the project can begin, we need to cut the shipping containers to size, to achieve the length of 18ft. On this occasion, we used the 'cut and shut' method, in order to retain all four corner posts on both containers. The corner posts give the container additional strength, especially during lifting. If our client requests these are left in tact, we use both ends of the same container during the cut up process, and then weld back together to the required length.
Work in Progress
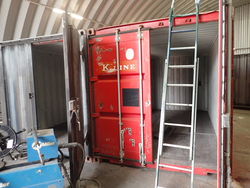
The two 18ft containers have their side walls cut, to create the opening which will join them. The two new apertures are then reinforced with a 100mm x 50mm steel box section frame. Read our news article LARGER CONVERSIONS - JOINING SHIPPING CONTAINERS TOGETHER for more on this process.
The doors
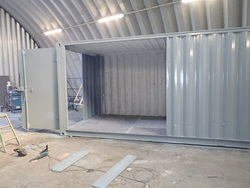
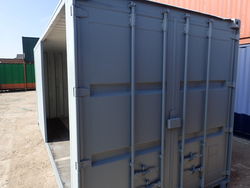
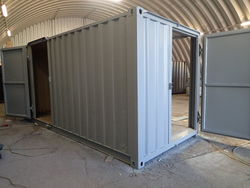
Container 1 has the original shipping doors left in place on the end. For container 2 we fabricated two half width (4ft), easy use flat panel doors, one for the end wall and in the side, to lead to the soon to be partitioned area of the container.
Partitioning Container 2
Our client had requested a seperate area of 8ft x 8ft. First we made a steel frame work to size, and welded this into the container. Next we cut steel sheets using our guillotine, which are used to fill the framework.
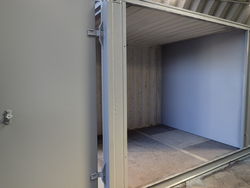
Py lining
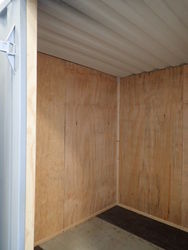
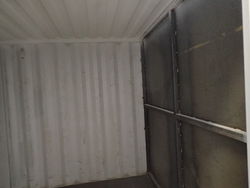
To insulate and prevent condensation, our client requested ply lining for the small partitioned area. The rest of the container, and all of Container 1, was treated with Grafotherm, sprayed onto the ceiling to inhibit condensation.
The final touches
To complete the conversion, we inserted a 300mm steel plate into the floor, with a 50mm drainage hole, to allow excess water to run away, in the floor of the container. Both containers were then repainted grey, and are ready for delivery. The containers are transported to their required destination as two units, accompanied by our welder who bolts and welds them together at the garden centre.
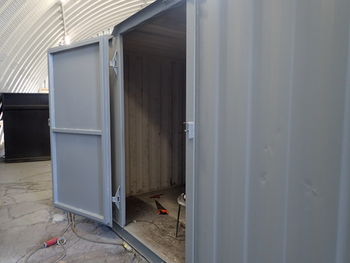
The CAD
Using computer aided design, we worked alongside our client's wishes to create an exact plan of their requirements.
 .
.As with any product, specification is subject to change without prior notification. You are advised to confirm current specification before buying.

